
Notice
Recent Posts
Recent Comments
| 일 | 월 | 화 | 수 | 목 | 금 | 토 |
|---|---|---|---|---|---|---|
| 1 | ||||||
| 2 | 3 | 4 | 5 | 6 | 7 | 8 |
| 9 | 10 | 11 | 12 | 13 | 14 | 15 |
| 16 | 17 | 18 | 19 | 20 | 21 | 22 |
| 23 | 24 | 25 | 26 | 27 | 28 |
Tags
- mx150
- unity5
- 랜더러
- 언리얼5
- 애프터이펙트 aftereffect ram preview no sound 소리 안날때
- 요가북
- 언리얼 한글
- 언리얼5 화면 움직임
- 언리얼 메뉴 한글
- msi gf63
- 언리얼 팁
- Unreal5
- shader
- 노트북 아답터
- legacy lightmap
- 노트북 그래픽 카드
- 3ds max #spring #스프링
- unity4
- 와콤 feel 드라이버
- 유니티
- gtx1050
- 로스트 아크
- 3dsmax
- gitea
- 언리얼 pan
- 언리얼 뷰포트 움직임
- legacy lightmapped
- Unity2018
- 내장 그래픽
- wacom feel
Archives
- Today
- Total
애니메이터
톤즈 오브 유티니 에셋쯔 1 - Magica Cloth 본문
Magica Cloth : Secondary Animation - 유료
매직카 클로쓰 - 세컨더리 애니메이션 자동화를 해주는 유니티 에셋
자기가 애니메이터다! 회사에서 Unity를 쓴다라고 한다면 이 에셋 구매를 추천
세컨더리 애니메이션에 대한 설정값을 고민하고 테스트해보기 힘들면 Preset값이 있어서 바로 적용해 사용해 볼 수 있다.
선작업 요소 - 매직카 클로쓰를 쓰기 위해 선작업 해 줘야하는 내용
1. Enable Preview Packages를 체크

2. Jobs 설치 - Package Manager에서 Unity Resistry 항목에서 Jobs를 찾아서 설치

3. Magica Cloth 설치 - 유료(투자할만한 가치가 있다)

Magica Cloth - $25
1. BoneCloth & MeshCloth
BoneCloth가 훨씬 가볍다. 그러므로 BoneCloth를 쓴다.
Magica Cloth 적용하기
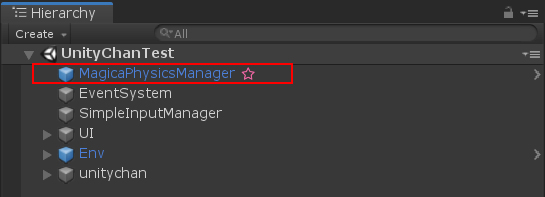
1. Magica Cloth의 physics manager를 Scene에 설치
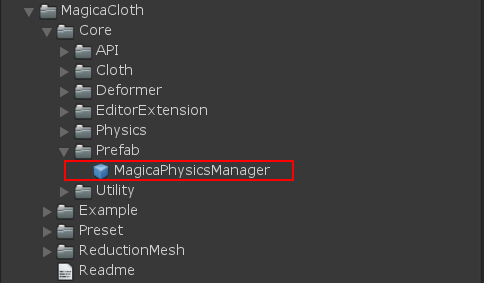
프로젝트창의 Magica Cloth폴더에서 MagicaPhysicsManager Prefab을 찾아서 Scene의 Hierarchy에 넣어둔다.
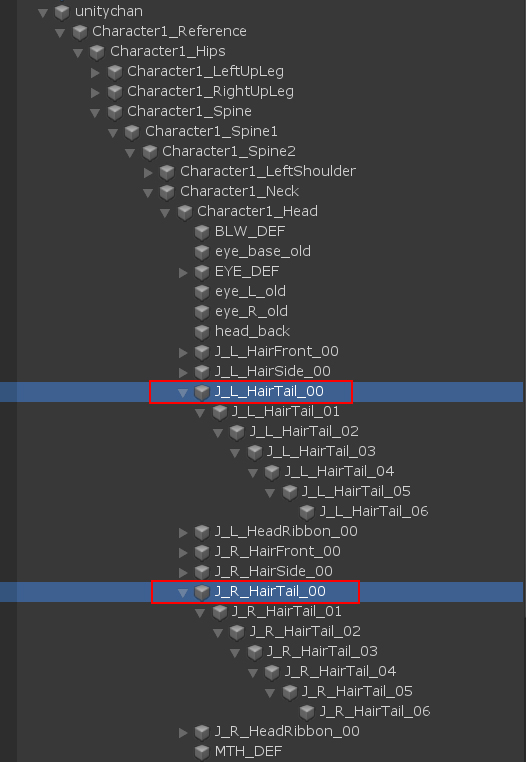
2. Character 모델에서 BoneCloth로 움직임을 제어할 가장 상위Bone을 확인.
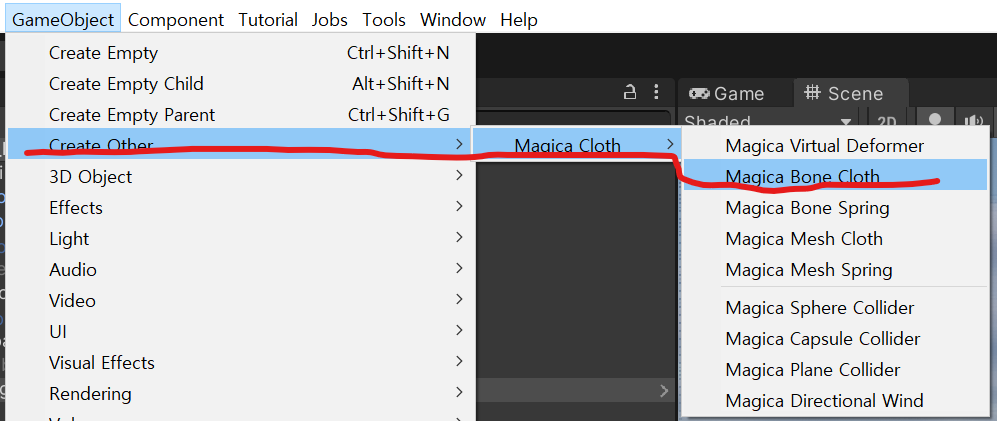
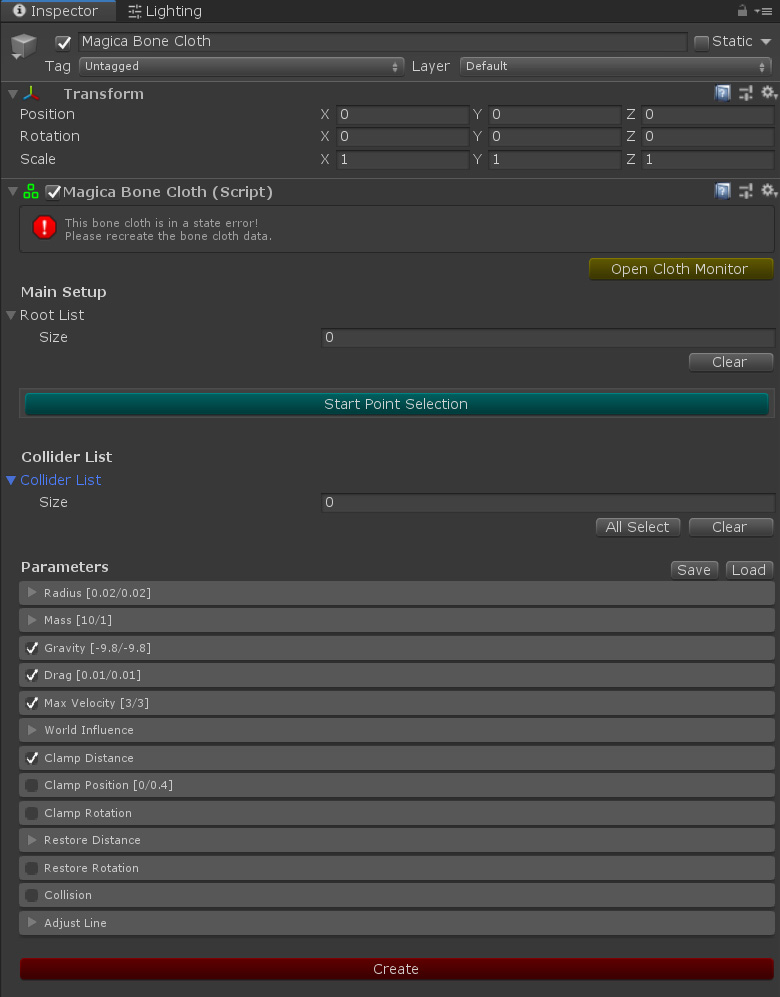
Character에 Creator Other에서 Magica Cloth/Magica Bone Cloth를 적용해준다.
적용된 Magica Bone Cloth를 확인해서 그 갯수에 맞게 Root List의 Size를 맞춰주고 등록한다.
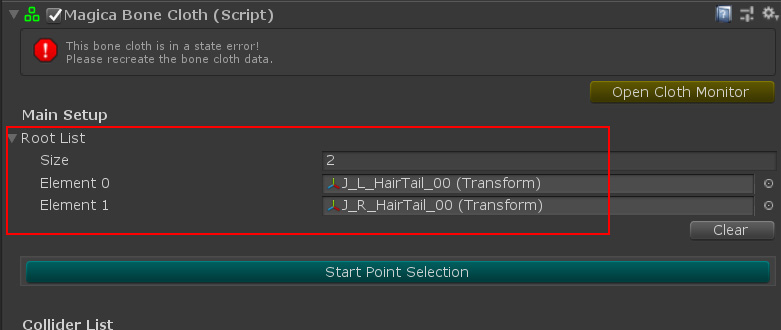
아래의 
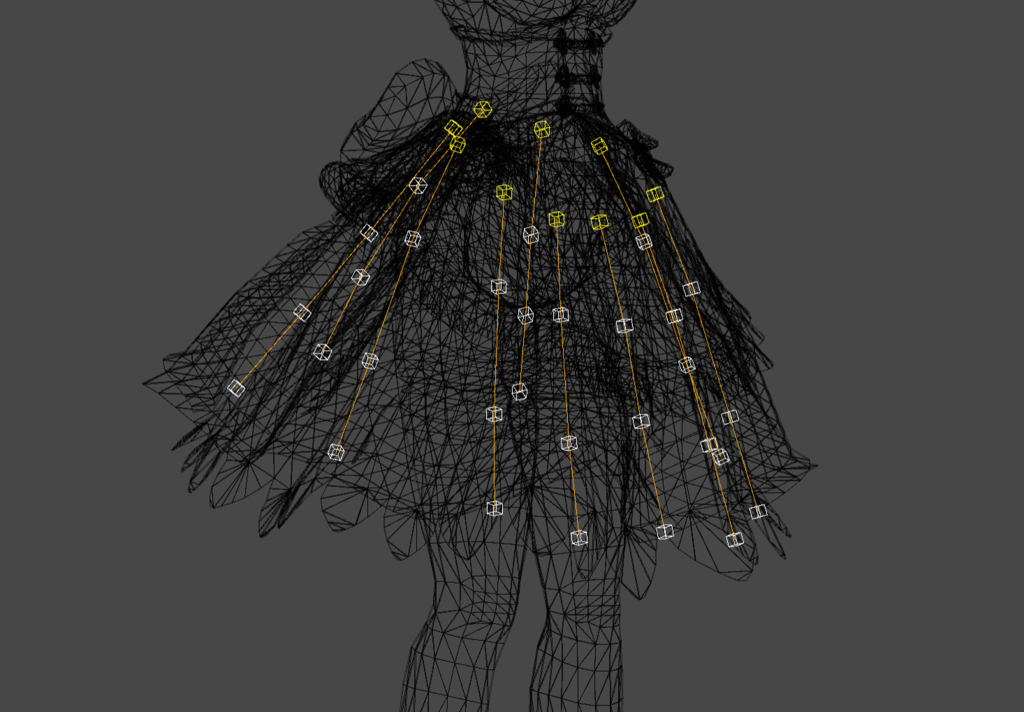
2. BoneCloth는 캐릭터 세팅에서 Bone을 적절히 세팅하는 것이 선행되어야 한다.
Bone의 위치가 스커트등의 형상과 많이 다르게 되면 불안정하게 되고 Bone간의 거리가 너무 멀면 충돌체크에서 정확성이 떨어진다.
<적절한 배치의 예>

3. Magica Cloth의 활용2 - 돛
- Magica Cloth 세팅 - Mesh Cloth
-
- 치마는 캐릭터 세팅에서 Bone을 박아 넣어 놨지만 돛은 그렇게 하지 않고 Mesh Cloth 시뮬레이션을 사용했다.

Virtual Deformer 관리자, Virtual Deformer, Mesh Cloth를 각각 설정한다. 
Fixed point(빨강)와 Move Point(초록)를 설정한다.
- 치마는 캐릭터 세팅에서 Bone을 박아 넣어 놨지만 돛은 그렇게 하지 않고 Mesh Cloth 시뮬레이션을 사용했다.


'Game Engine/Unity3D' Related Articles
more

